ESP8266 Clock Using MAX7219 LED Matrix Display Hackster.io
Step 1: Story: Hi guys, today we are going to discuss, interfacing of neo pixel led through NodeMCU ( ESP8266-12E ). Neopixel is addressable led, we can program to display any number/name in any color using microcontroller. Neo pixel came in different smd packages, here we are using Ws2812b- 5050 mini RGB.
ESP8266 Led Matrix Clock Sonocotta
ESP8266 LED Matrix Clock. Tuesday April 6, 2021 / Muhammad Bilal. Contents hide. 1 Step 1: Parts and Tools. 2 Step 2: Preparing the LED Matrix. 3 Step 3: Connect the LED Matrix Display and the RTC to the ESP8266. 4 Step 4: Flash the ESP8266 Module. 5 Step 5: Apply the Solar Film on the Pasta Jar. 6 About The Author.

Esp8266 LED Clock YouTube
12 11 Team ( 1 ) andriy.malyshenko Join this project's team code repo MISC completed project ESP8266 max7219 ntp LED MATRIX This project was created on 11/02/2022 and last updated 6 months ago. Description This entry level Kit as quick and simple to-it-together activity for soldering education and just for fun.

64x32 RGB Led Matrix Clock With esp8266 YouTube
245 65 Featured Download By Jon_Fuge Follow More by the author: This instructable will guide you through the process of connecting the following parts to create an interesting and accurate analogue / digital clock which will automatically set the time from the internet. Parts needed: ESP8266-12E module (can be bought for £3 from eBay)

ESP8266 Clock with Max7219 Matrix display Date & Time Display and
DIGITAL DISPLAY SYSTEMS, INC. 318 Martin Ave Santa Clara, CA 95050 Hours of Operation: Monday - Friday 8am - 5pm (Pacific Standard Time) U.S. Toll-Free: (888) 310-1150 Telephone: (408) 734-9871 Fax: (408) 734-9874 Email: [email protected]

IoT clock with LED matrix (Arduino & ESP8266) Cassiopeia Ltd
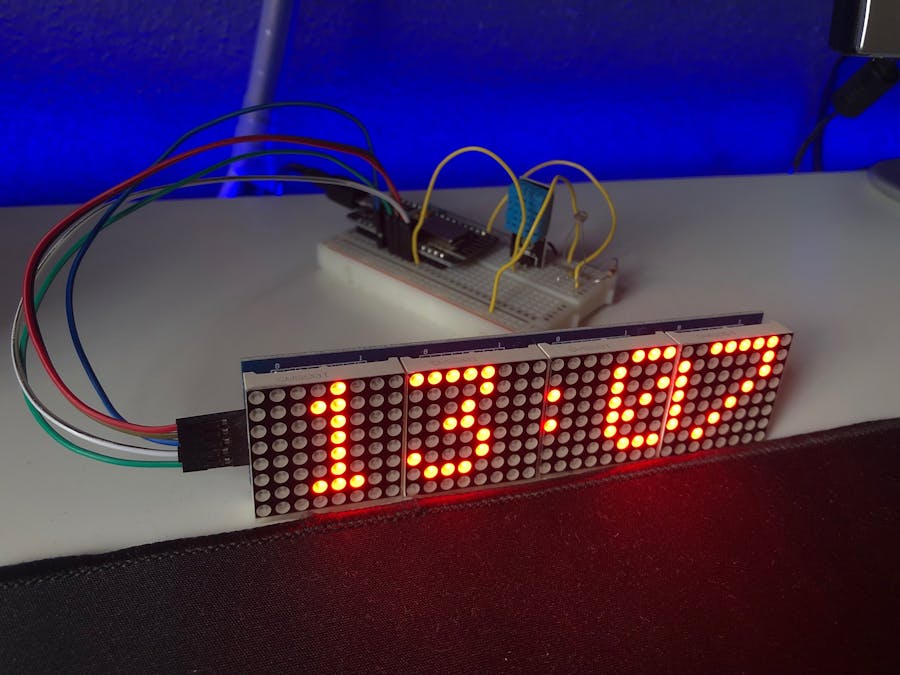
ESP8266 Clock Using MAX7219 LED Matrix Display A simple connected clock and weather report using ESP8266, MAX7219 LED matrix display, and DHT11 temperature and humidity sensor. Intermediate Full instructions provided 1 hour 47,350 Things used in this project Story

Arduino Pdf, Esp8266 Projects, Circuit Board Design, Led Matrix, Tool
ESP8266 LED Matrix Clock. Thursday October 4, 2018 / Ibrar Ayyub. Contents hide. 1 Step 1: Parts and Tools. 2 Step 2: Preparing the LED Matrix. 3 Step 3: Connect the LED Matrix Display and the RTC to the ESP8266. 4 Step 4: Flash the ESP8266 Module. 5 About The Author. 5.1 Ibrar Ayyub.
LED Matrix Clock Kit ESP8266 Clock with MQTT LED Matrix Info
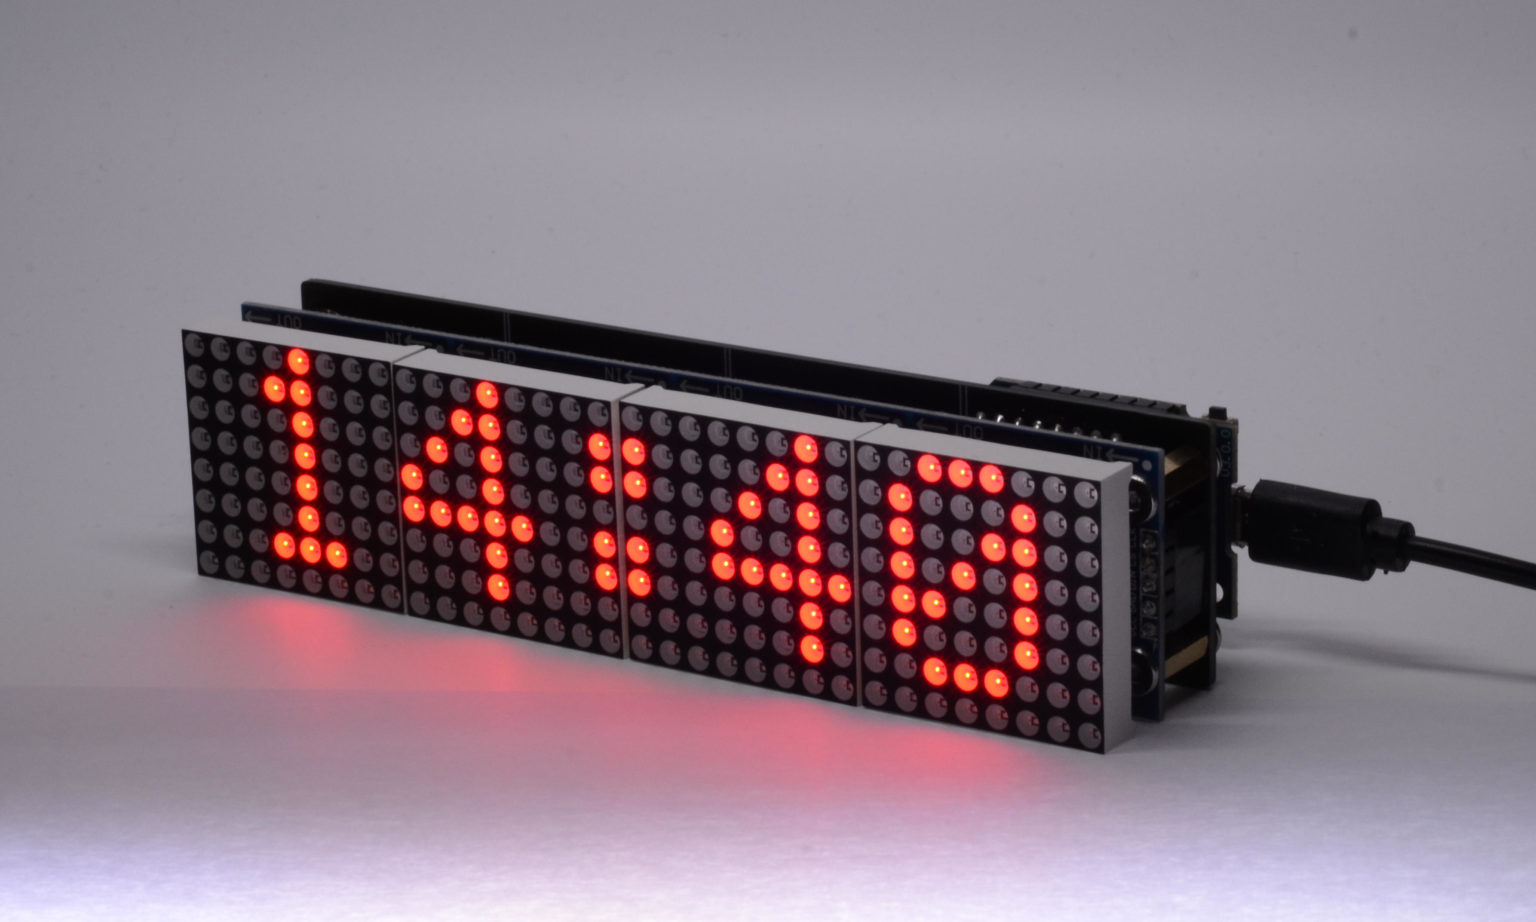
Simple LED matrix Clock based on the popular ESP8266 with Real Time Clock module and time synchronization over WiFi from an NTP server. Step 1: Parts and Tools First let's see what we need. Parts: 6 x 8×8 MAX7219 LED Matrix 1 x RTC DS3231 1 x ESP12 Board 1 x pasta jar 1 x 5.5mm X 2.1mm DC Power Supply Metal Jack Panel Mount

Neopixel LED Clock + ESP8266 YouTube
ESP8266 LED Matrix Clock Simple LED matrix Clock based on the popular ESP8266 with Real Time Clock module and time synchronization over WiFi from an NTP server. NEW ! ESP32 version also available Ask Question Comment Step 1: Parts and Tools First let's see what we need. Parts: 6 x 8x8 MAX7219 LED Matrix Banggood 1 x RTC DS3231
LED Matrix Clock Kit ESP8266 Clock with MQTT LED Matrix Info
Digital Display Systems manufactures custom digital LED displays, including a large range of multi time zone clocks, calendars clocks, elapsed and countdown timers, factory production counters, OEE monitoring machines, TAKT time displays and more. Clocks can be standalone or network synced.

ESP8266 LEDMatrix Sign and Clock YouTube
Next steps. Now when we have RBG led circle and esp8266 development environment configured and connected to WiFi. The next step will be to implement NTP Clock on esp8266. Then we need to implement WS2812B control and connect everything. But that will be done in the next post (Project Led WiFi Clock part 2), as soon as WS2812B Module Strip.

LED matrix clock with ESP8266 (5) YouTube
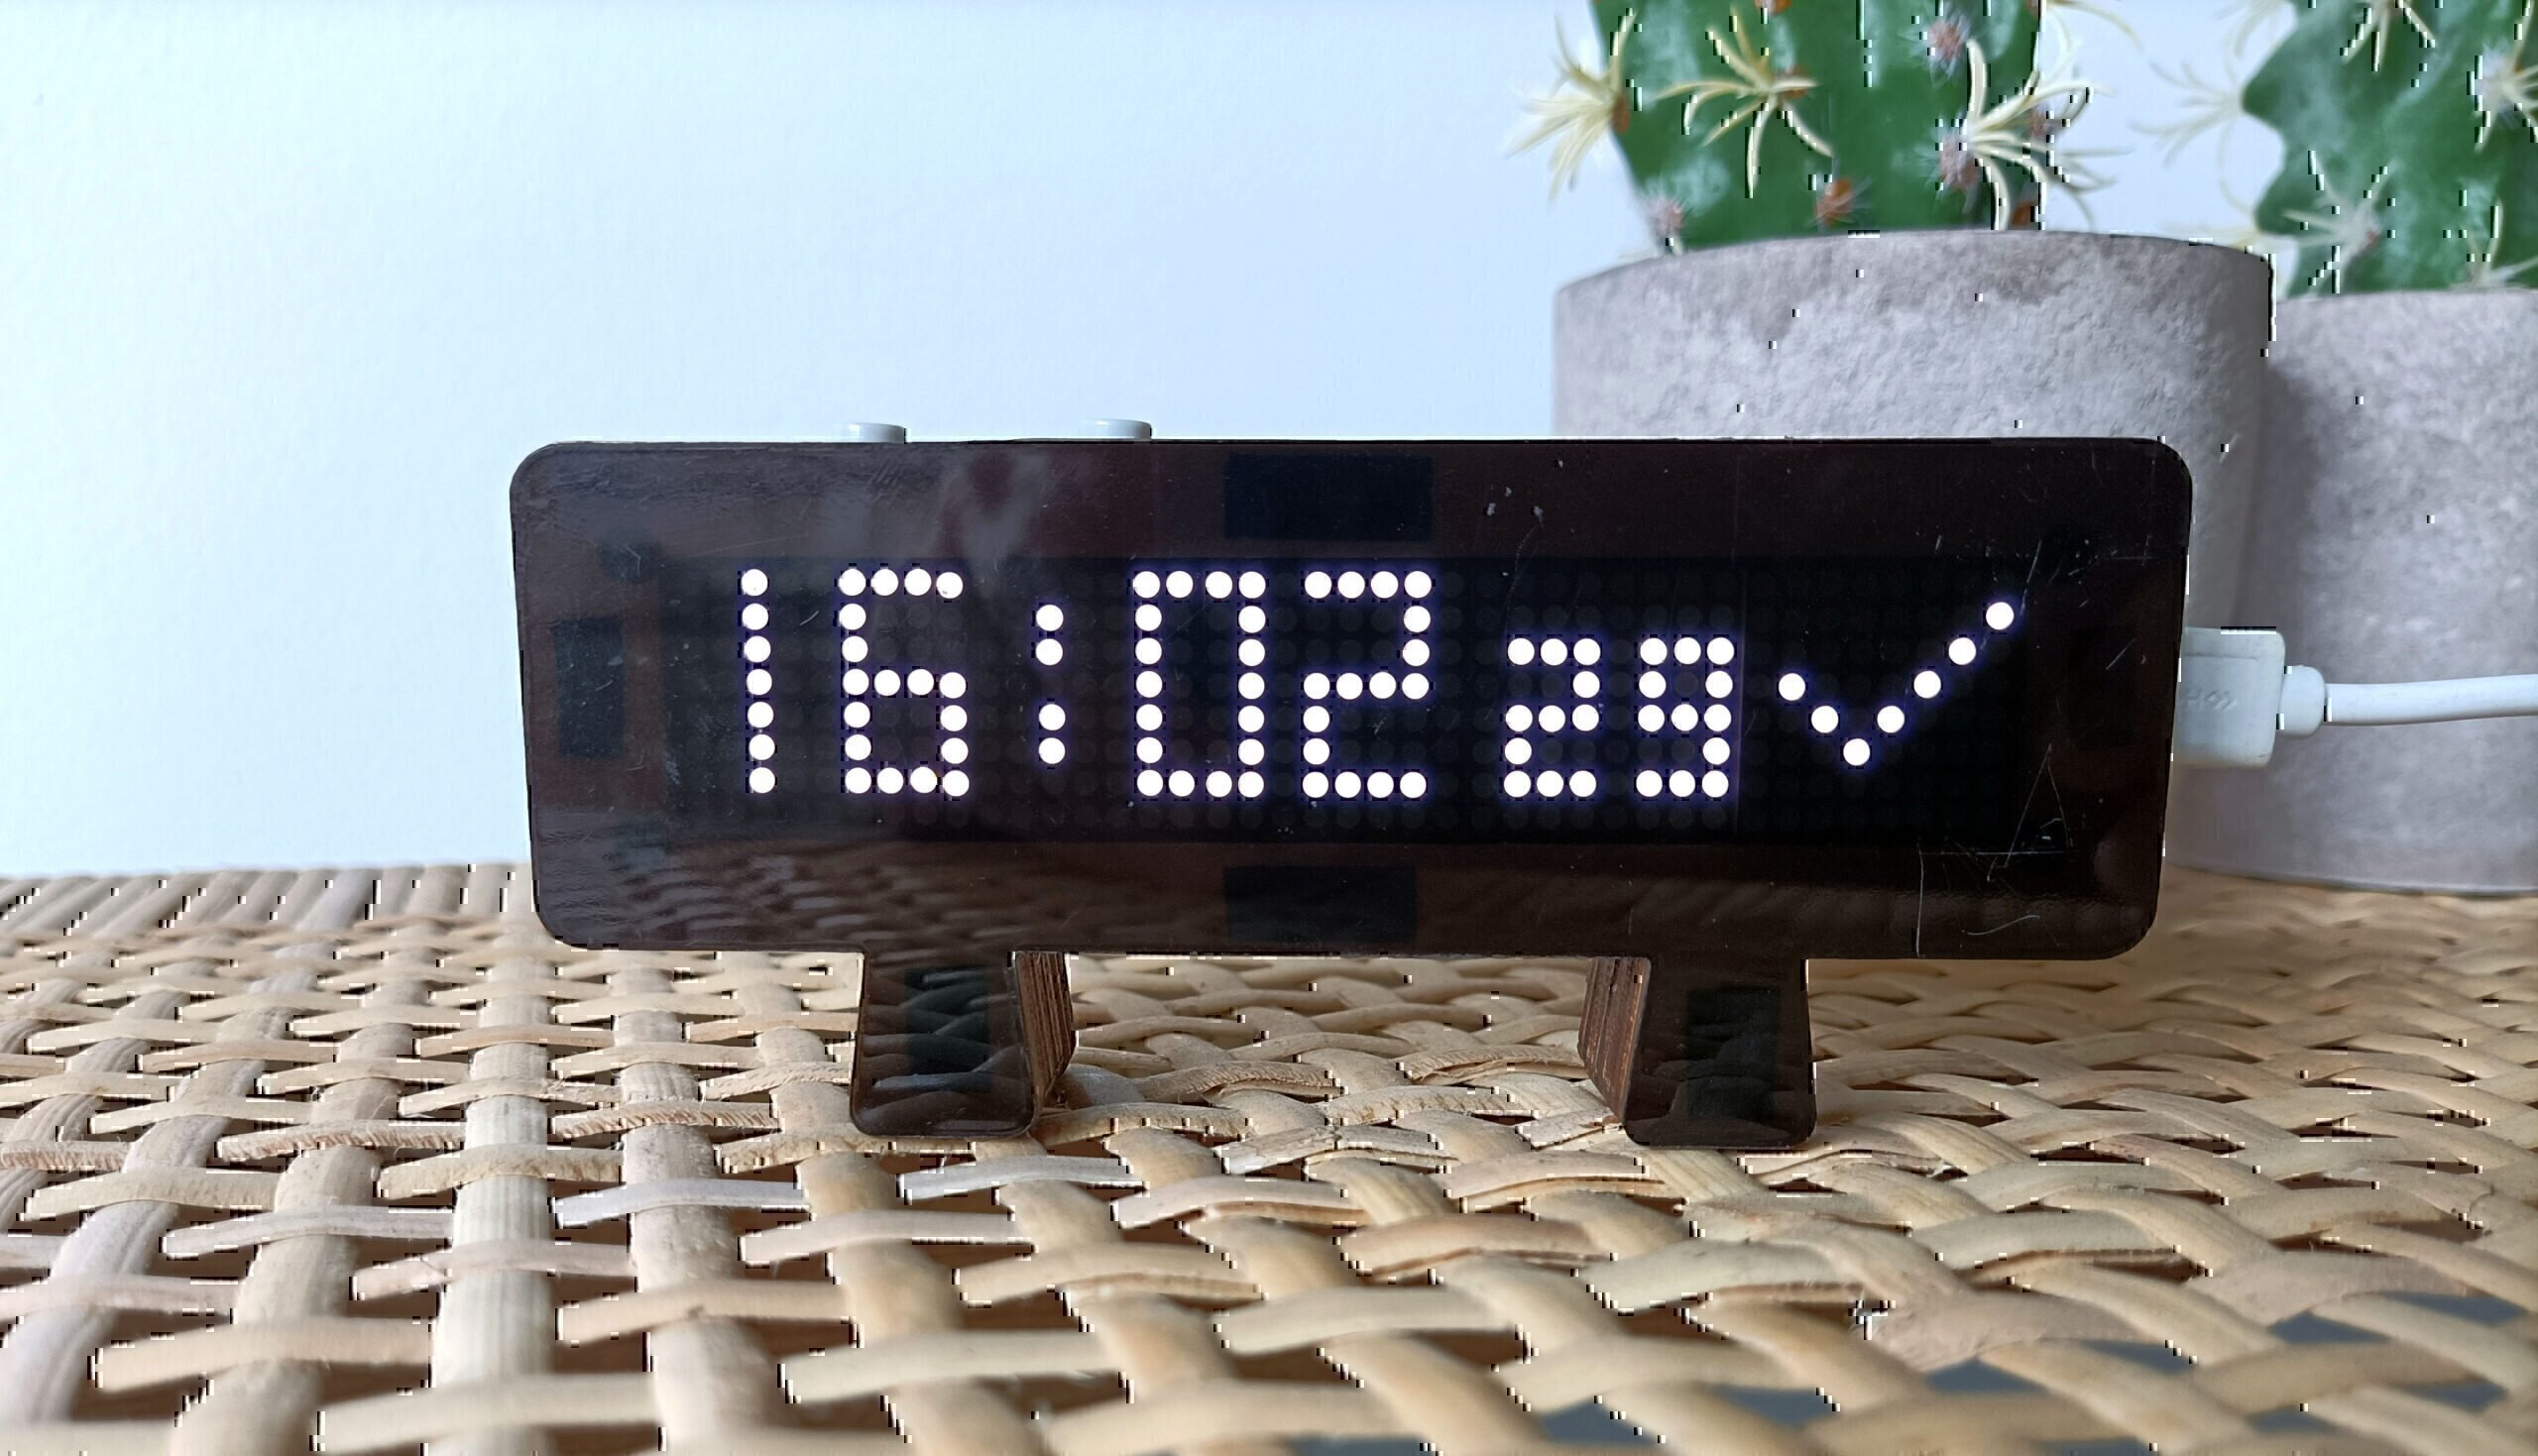
Step 1: Things Needed Here are the things that you will need to make ESP Matrix: Wemos D1 Mini - ESP8266 MAX7219 LED Dot Matrix Panel Dupont cable - Included in LED Dot Matrix Panel OTG Adapter Micro USB cable 3D Printed Case Pieces of transparent colored Acrylic 129x32x3mm

WiFi Round LED Clock (ESP8266 and WS2812B) YouTube
Wi-Fi Round LED Clock (ESP8266 and WS2812B) - YouTube © 2023 Google LLC Update 20190402: Added a thicker wall segment piece and also one single part if you're printer is large enough to print.

ESP8266 LED Matrix Clock YouTube
ESP8266 WiFi Internet real time clock ESP8266 WiFi Internet real time clock 5 Comments / By Simple Projects / June 25, 2018 In the last ESP8266 project, I built a simple real time clock using a real time clock chip (DS3231 and DS1307), I used a 16×2 LCD to display time and date and 2 push buttons to set them.
GitHub clockspot/arduinoledclock Digital clock code with NTP sync
Connect the ESP8266 board to your computer using a USB cable. Open Arduino IDE on your computer. Choose the correct ESP8266 board, such as (e.g. NodeMCU 1.0 (ESP-12E Module) ), and its respective COM port. Click the Upload button on Arduino IDE to compile and upload the code to the ESP8266 board. Observe the outcome: The internal LED light.

LED Matrix Clock with ESP8266 YouTube
7.577 Views 0 Comments Simple LED matrix Clock based on the popular ESP8266 with Real Time Clock module and time synchronization over WiFi from an NTP server. One note on the RTC module, apparently it also has the ability to charge the battery, however that's not a good idea when using a CR2032.